Mastering Water & Soil Propagation: Dual Paths to Thriving Houseplants
Propagation is the art of creating new plants from existing ones, a rewarding practice that expands your collection and deepens your horticultural understanding. This guide will walk you through the distinct yet equally effective methods of water and soil propagation, empowering you to choose the best approach for various houseplants.
 By Dr. Elena Hartwood10 min read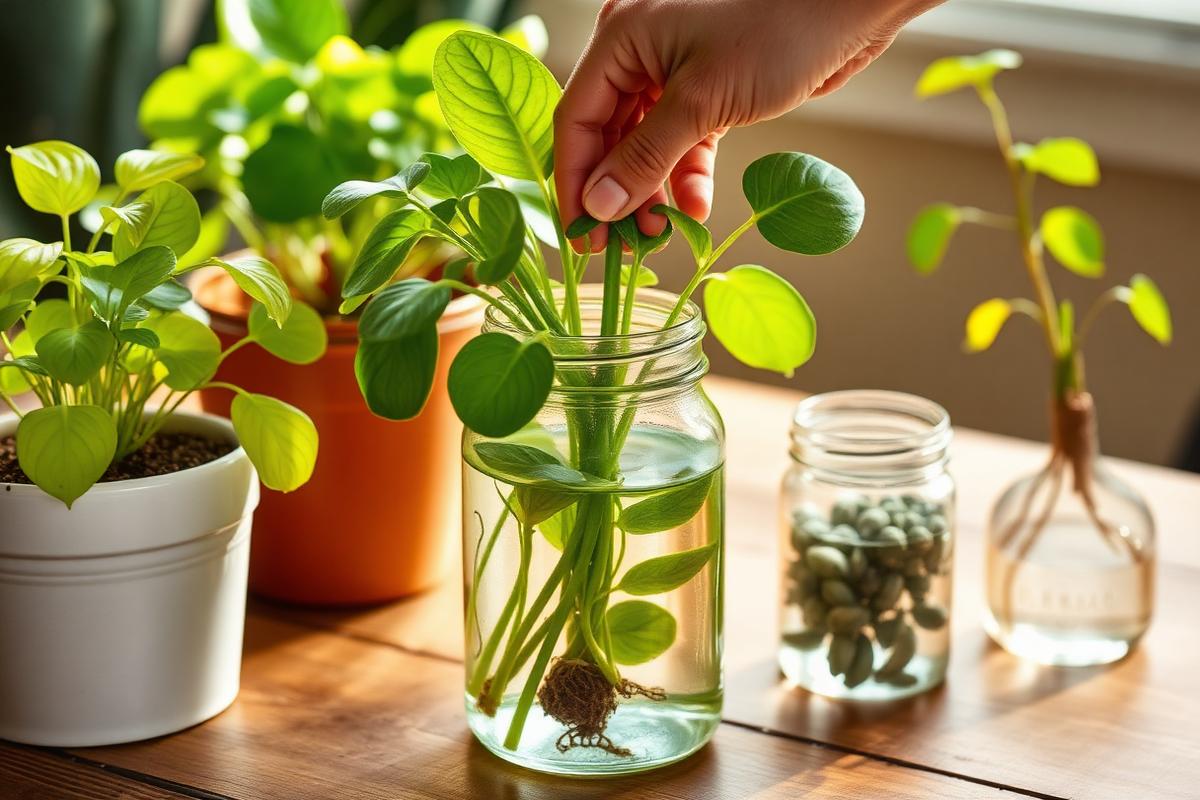
The Fundamentals of Plant Propagation: An Overview
Plant propagation, at its core, is the process of generating new plants from a mother plant. This horticultural practice is not only cost-effective but also incredibly satisfying, allowing you to replicate your favorite specimens, share them with friends, or even save a plant that might be struggling. Success hinges on a foundational understanding of plant physiology and providing the optimal conditions for root development.
Before diving into specific techniques, it is crucial to recognize that not all plants respond equally to every propagation method. Factors such as plant species, cutting type (stem, leaf, or root), and the plant's overall health play significant roles in the outcome. A well-hydrated, pest-free mother plant provides the best possible genetic material for propagation.
Regardless of the method chosen, sterility is paramount. Always use clean, sharp pruning shears or a knife to make cuts, sterilizing your tools with rubbing alcohol between each plant. This simple step minimizes the risk of introducing diseases to your cuttings or the parent plant, safeguarding the health of your entire collection.
Water Propagation: Observing New Life Unfold
Water propagation is often favored by beginners due to its simplicity and the fascinating visual experience of watching roots emerge. It involves placing cuttings directly into water, where they will develop roots over time. This method is particularly effective for many popular houseplants, including Pothos, Philodendron, Syngonium, and some types of Begonias.
To execute water propagation successfully, select a healthy stem cutting, ensuring it has at least one node and a few leaves. Remove any leaves that would fall below the waterline to prevent rot. Place the cutting in a clear glass or jar filled with fresh, non-chlorinated water. Change the water every few days to replenish oxygen and prevent bacterial growth, which can lead to stem rot.
Position your water cuttings in a location that receives bright, indirect light. Avoid direct sunlight, which can overheat the water and stress the delicate new roots. While rooting hormone is generally not essential for water propagation, it can still accelerate root development. Patience is key; roots typically appear within a few weeks, but some species may take longer. Once roots are about 1-2 inches long, they are ready for potting.
Soil Propagation: A Direct Route to Establishment
Soil propagation offers an alternative, often more robust, pathway to rooting, as cuttings develop roots directly in a suitable substrate. This method typically results in a sturdier root system from the outset, potentially reducing transplant shock when moving from water to soil. It is particularly effective for plants that prefer not to transition from water, or for those whose cuttings are prone to rot in standing water.
For successful soil propagation, prepare your potting medium first. A well-draining, airy mix is crucial, such as a combination of peat moss or coco coir, perlite, and a small amount of compost. Avoid heavy garden soil, which can compact and retain too much moisture, leading to rot. Moisten the substrate thoroughly before inserting your cuttings; it should be damp but not waterlogged.
Take healthy stem cuttings as you would for water propagation, removing lower leaves. Dip the cut end into rooting hormone powder or gel, ensuring even coverage. This step, while optional for some plants, significantly increases the chances of successful rooting by stimulating cell division. Create a small hole in your prepared soil with a pencil or stick, then carefully insert the cutting, firming the soil gently around the stem to provide stability.
After planting, provide high humidity to prevent the cutting from drying out while it develops roots. This can be achieved by placing a plastic dome, clear plastic bag, or even a cut-off plastic bottle over the cutting. Place the potted cutting in a location with bright, indirect light and maintain consistent moisture in the soil, ensuring it never dries out completely, but also avoiding oversaturation.
Optimizing Conditions for Rooting Success
Regardless of whether you choose water or soil, several environmental factors profoundly influence the success rate of your propagation efforts. Temperature plays a critical role; most cuttings root best in warm environments, ideally between 70-75°F (21-24°C). Cooler temperatures can slow down metabolic processes and root development, while excessively high temperatures can stress the cutting.
Humidity is another vital component, especially for soil-rooted cuttings, as it reduces water loss through transpiration from the leaves before roots can adequately absorb moisture. For plants propagating in soil, a humidity dome or regular misting can emulate the moist conditions necessary for survival. For water propagation, the surrounding air humidity is less critical, but consistent water levels remain important.
Light exposure also requires careful consideration. Cuttings benefit from bright, indirect light; direct sunlight is often too intense and can scorch tender leaves and stems, leading to desiccation. Insufficient light, conversely, will hinder the plant's ability to photosynthesize and generate the energy needed for root growth. A north-facing window or a spot several feet from a bright east or south window is typically ideal.
Troubleshooting Common Propagation Challenges
Even with careful attention, propagation can present challenges. One of the most common issues is rot, characterized by the stem turning dark, soft, and mushy. This is typically caused by too much moisture, poorly draining soil, or bacterial/fungal infections. To address this, ensure your soil is well-aerated, avoid overwatering, and always use sterilized tools. If rot is observed, discard the affected cutting to prevent spread.
Another frequent problem is lack of rooting. If weeks pass without any sign of root development, the cutting might be unhealthy, the environment unsuitable, or the specific plant difficult to root from cuttings. Re-evaluate your cutting source, check the temperature and light conditions, and consider using rooting hormone. Some plants might simply require more time or a different propagation method.
Wilting is a sign of dehydration, often occurring when the cutting is losing water faster than it can absorb it (which is zero if no roots have formed yet). This is common in soil propagation if humidity is too low. Increase ambient humidity, keep the soil consistently moist, and ensure the cutting is not exposed to harsh light or drafts. In water propagation, wilting can sometimes indicate the water needs changing or that the cutting is not viable.
Transplanting Rooted Cuttings: The Final Step
Once your water-rooted cuttings have developed a robust root system (typically 1-2 inches long), they are ready for their transition to soil. This transition can be a delicate process, as the roots formed in water are often finer and less adapted to the denser, drier environment of soil. To minimize shock, pot them into a small container with a well-draining potting mix, similar to what was recommended for soil propagation.
For both water and soil-rooted cuttings, the initial potting should be into a pot that is only slightly larger than the root ball. Over-potting can lead to excess moisture retention, increasing the risk of root rot. After potting, water thoroughly, and place the newly potted plant in a location with bright, indirect light. Maintain slightly higher humidity for the first week or two to help the plant acclimate.
Continue to monitor your newly potted plants closely for signs of stress, such as wilting or yellowing leaves. Gradually reduce humidity over several weeks until the plant is fully acclimated to its new environment. With patience and consistent care, your propagated cuttings will grow into robust, independent plants, ready to enhance your indoor garden.
Key takeaways
- Water propagation suitable for many plants, ideal for observing root development.
- Soil propagation offers a direct path to establishment, reducing transplant shock.
- Sanitation is crucial in both methods to prevent issues.
- Rooting hormone can significantly improve success rates, especially in soil.
- Providing appropriate light and humidity is vital for young cuttings.
- Understanding individual plant needs dictates the best propagation method.
Frequently asked questions
What is the best type of water for propagation?
Filtered tap water or distilled water is ideal, as it minimizes chlorine and other chemicals that can harm delicate new roots. If using tap water, let it sit out for 24 hours to allow chlorine to dissipate.
How often should I change the water for water propagation?
Change the water every 3-5 days. This replenishes oxygen, prevents stagnation, and reduces the buildup of harmful bacteria or algae that can lead to stem rot.
Is rooting hormone necessary for propagation?
While not always strictly necessary, rooting hormone significantly increases success rates, especially for soil propagation and for plants that are more challenging to root. It contains auxins that stimulate root growth.
When is the best time to propagate houseplants?
The best time to propagate most houseplants is during their active growing season, typically spring or early summer. This provides them with ample light and warmth to establish new roots quickly.
Why are my water cuttings rotting instead of rooting?
Rotting usually indicates bacterial or fungal infection, often caused by old water, leaves submerged in water, or non-sterile tools. Ensure clean water, remove all submerged leaves, and sterilize your cutting tools.
Can I use regular potting soil for soil propagation?
It's best to use a specialized propagation mix or a light, well-draining potting mix amended with perlite or vermiculite. Regular potting soil can be too dense and retain too much moisture, leading to rot.
Related articles
More in Plant Propagation →
Mastering Plant Multiplication: A Horticulturist's Guide to Propagation Beyond Cuttings
Ready to expand your indoor plant collection or share your green thumb's bounty? Moving beyond simple stem cuttings, mastering various propagation techniques empowers you to multiply your favorite plants with confidence and precision.

Mastering Plant Multiplication: A Horticulturist's Guide to Propagation Techniques
Curious about expanding your indoor plant collection without buying new specimens? Propagation is the art and science of creating new plants from existing ones, a rewarding skill that brings horticultural satisfaction and lush greenery to your home.

Cultivating New Life: A Horticulturist's Guide to Diverse Propagation
Propagation is the art of creating new plants from existing ones, a fundamental skill for any indoor gardener seeking to expand their collection, share with friends, or simply understand the life cycle of their beloved greenery. This guide will demystify the core techniques, transforming you into a proficient plant parent capable of multiplying your verdant companions.

Cultivating Tomorrow's Garden: A Horticulturist's Guide to Plant Division
Unlock the secret to multiplying your favorite indoor plants and edibles through the straightforward yet effective technique of plant division. This guide provides comprehensive, horticulturist-approved steps to ensure your success.

Unlocking New Growth: Your Complete Guide to Indoor Plant Propagation
Transform your indoor garden into a flourishing oasis by learning the art of plant propagation. This comprehensive guide will equip you with the knowledge to multiply your favorite houseplants and edibles with confidence, ensuring a vibrant and expanding collection.

Multiplying Your Greenery: Advanced Propagation for Robust Indoor Plants
Beyond the basic snip, truly multiplying your indoor plant collection requires a deeper understanding of plant physiology and precise techniques. This guide explores advanced propagation methods to ensure robust, healthy new specimens.